Today we are wiring our Battleborn Batteries in parallel this is an easy and straightforward task that should give you some confidence to start wiring your 12 Volt system in your van conversion.
Here are the tools I used in this video. If you don’t have a vice grip you can buy heavy-duty cable crimpers to do the trick as well.
2 Gauge Wire - https://amzn.to/3m1W9TE
Copper Lugs + Heat Shrink - https://amzn.to/3xaXKwR
SOK Lithium Batteries - https://www.us.sokbattery.com/?ref=a7n6vo6o5a
Heat Gun - https://amzn.to/3x3SjhH
Heavy-Duty Crimper - https://amzn.to/3NaDAZr
Wire Cutter - https://amzn.to/3x5sGyr
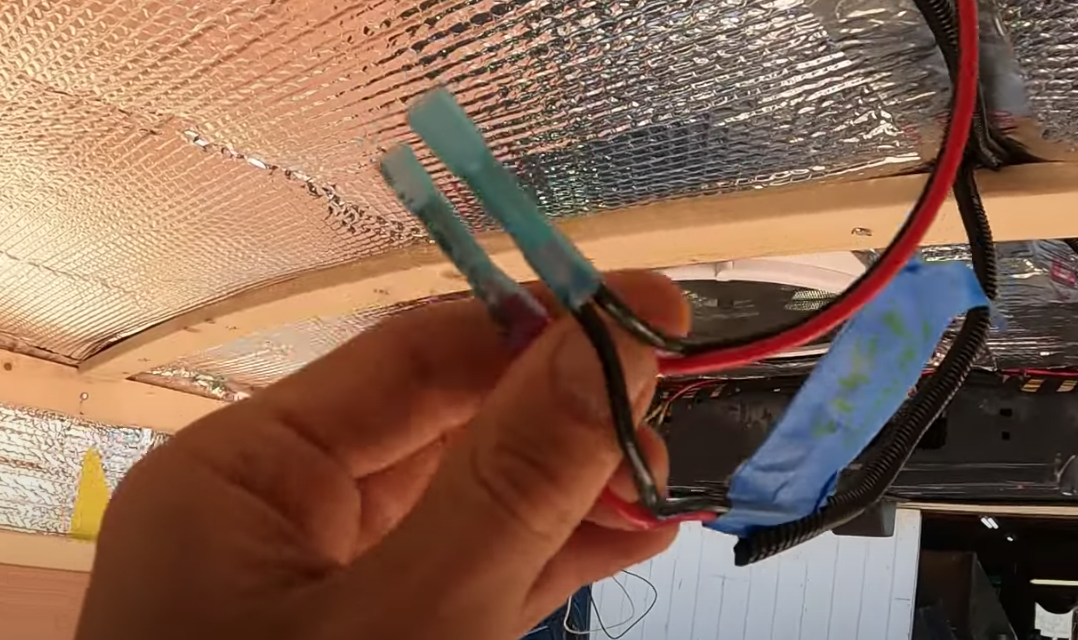
The first order of business is cutting your cables. Make sure you cut all the cables the same length this is very important for the longevity of the batteries. Next, you will want to strip the ends of the wires to put on the copper lugs. Whatever you use to crimp this make sure you have a very tight and positive connection on the lug. You can test it by giving it a good tug to ensure it is tightly secured. Make sure you slide and put your heat shrink on first before you crip your lug otherwise you might not be able to get it to slip over the lug. Once the lugs are secured use your heat gun or a lighter to apply the heat shrink to your cables. Once they are crimped and heat-shrunk they are ready to be installed.
You should have already established a secure ground connection either to the chassis of your van or to the secure ground that you have created. You can always get your ground by checking the resistance or ohms on a multi-meter.
When wiring your battery in parallel always start with the ground connections first before moving on to the positive runs. Also, when attaching your cables make sure they are tight but do not over-tighten the battery terminals. This can damage the batteries for good and you may not get a return on them as it will void the warranty. Use a socket set or a Phillips screwdriver (depending on the battery) to tighten the lugs to the battery terminals. Now that all your batteries are wired in parallel you can now test to make sure each battery voltage is the same. You can do this with a multimeter and set it to DC Volts. Put the red and black prongs on their correct terminals and measure the battery voltage. It should have the same reading across all your batteries. If you are getting different readings check your connections and crimpings to ensure they are tight.
Once your batteries are wired in parallel you are ready to start wiring the rest of your 12 Volt system.
Congratulations you have started the first project to wiring your own 12-volt solar system. Give yourself a pat on the back and have a mini celebration.
Happy Building ya kooks!